How to Draw Eren Jaeger Easy Warrior Cat Sitting Base
This step by step tutorial explains how to draw a sitting cat from the front view and provides detailed illustrated examples for each step.
Animals are a fairly difficult to draw and may requite different approaches for different poses. This tutorial provides a very in depth breakdown of drawing a sitting cat which should make the process much easier even if you are beginner.
Step 1 – Cat Proportions Sketch
Start the drawing of the sitting cat by first sketching out the major shapes of the its's body.
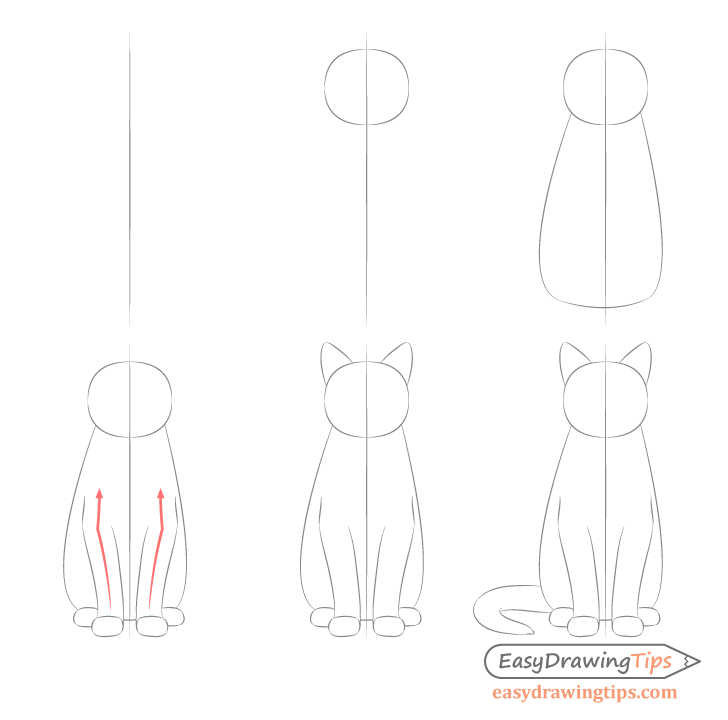
- As the drawing will be fairly symmetrical draw a vertical line that will help you see if both side are of even width.
- Sketch out the head which will be a bit like an oval but with squashed in sides.
- Draw the body that will be shaped sort of like a drop of water with the head resting on top of it.
- Draw the outer shapes of the paws without any of the small details like the toes.
- Draw the rough shape of the front legs that will curve slightly outwards about halfway up the body and then angle a little bit inwards.
- Draw the outer shape of the ears and the tail.
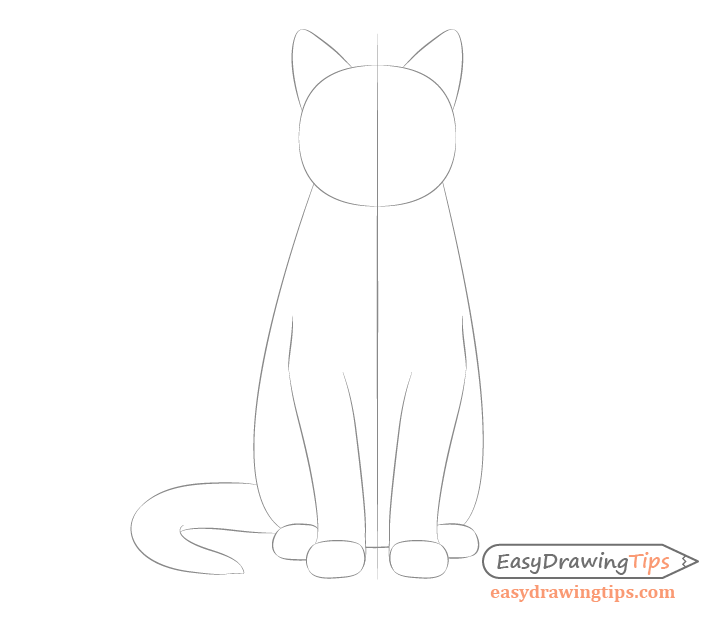
Step – 2 Cat Body Shape
After you have the basic proportions and shape of the cat draw in some of the smaller shapes and curves of the body.
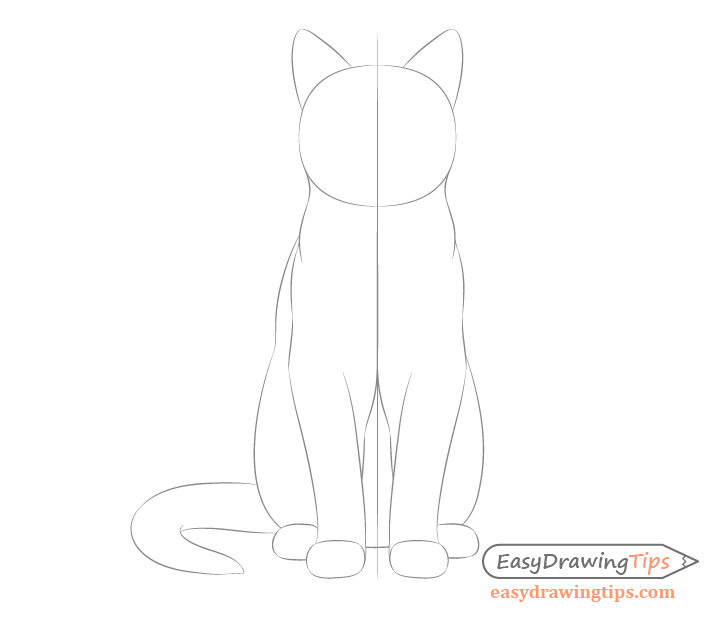
Step 3 – Cat Face Proportions Sketch
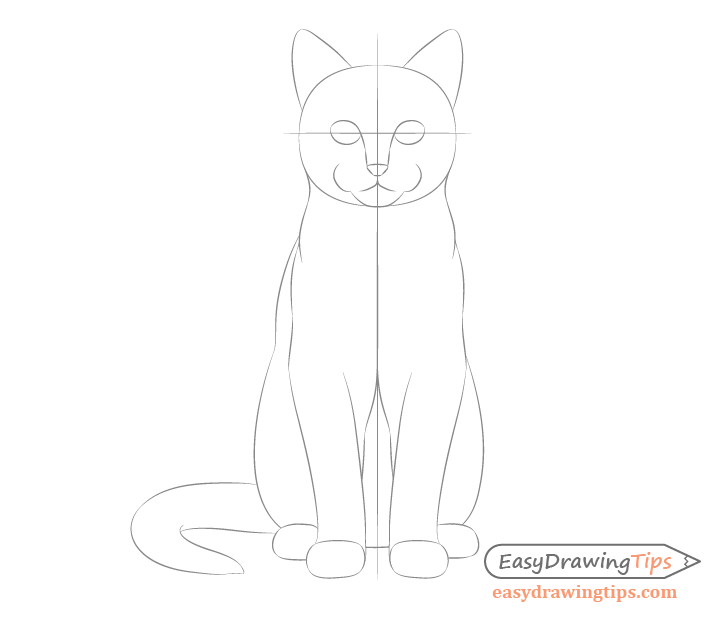
- Draw a horizontal line through the head to help you place the cat's eyes on the same level.
- Draw the eyes as sort of ovals with slightly pointy ends that are angled a little bit inwards.
- Draw the nose close to a triangle with the bottom end slightly cut off.
- Make two sets of curved lines going form the inner tips of the eyes towards the tip of the nose. These will represent the bridge of the cat's nose.
- Draw the mouth area with two curved shapes to each side for the top and one more for the bottom jaw.
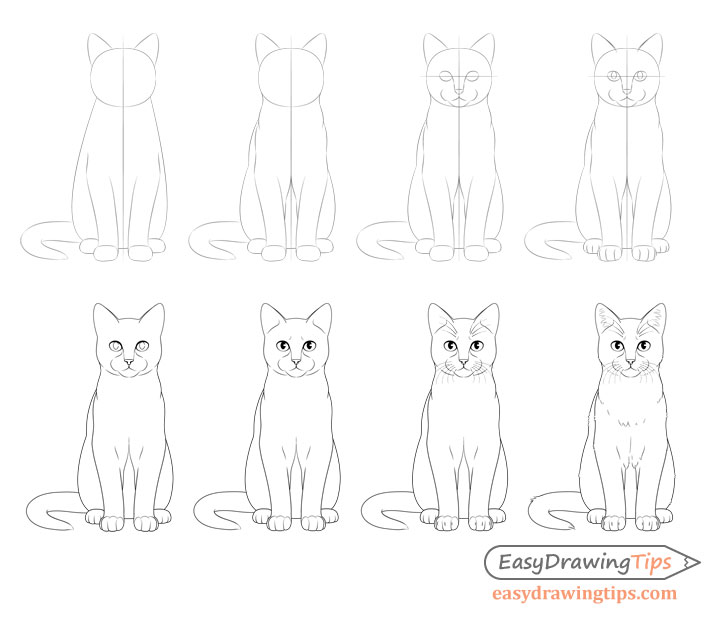
Step 4 – Details Sketch
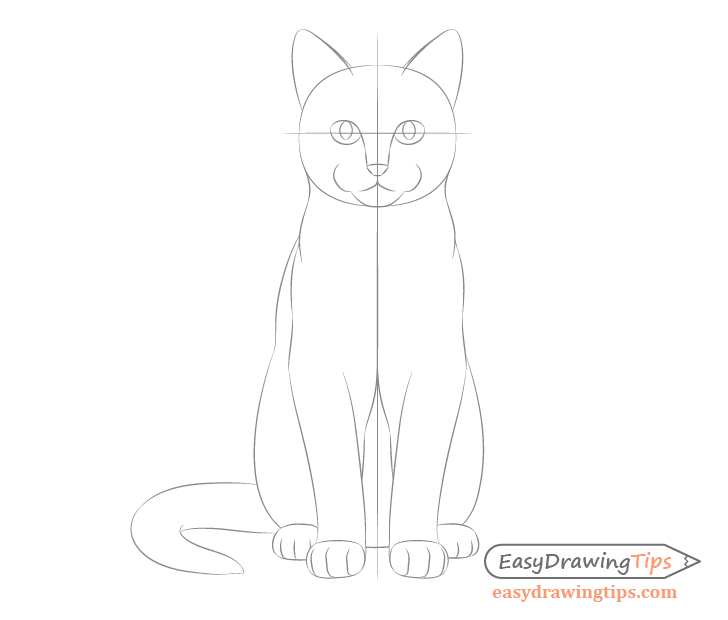
Move the the smaller details of the cat in this step.
Draw the pupils of the eyes. A cats pupils are basically vertical ovals with pointy ends so draw accordingly.
Next draw some division lines on the paws to indicate the individual toes. Keep in mind that the front paws in this example are slightly angled so as the toes turn away from the viewer they will become less visible. Draw the dividers accordingly with smaller division for the far toes.
The pack paws are angled as well but the paw on the left is facing more directly towards the viewer while the paw on the right is facing more sideways. For this reason one toe on the right-side leg will not be visible.
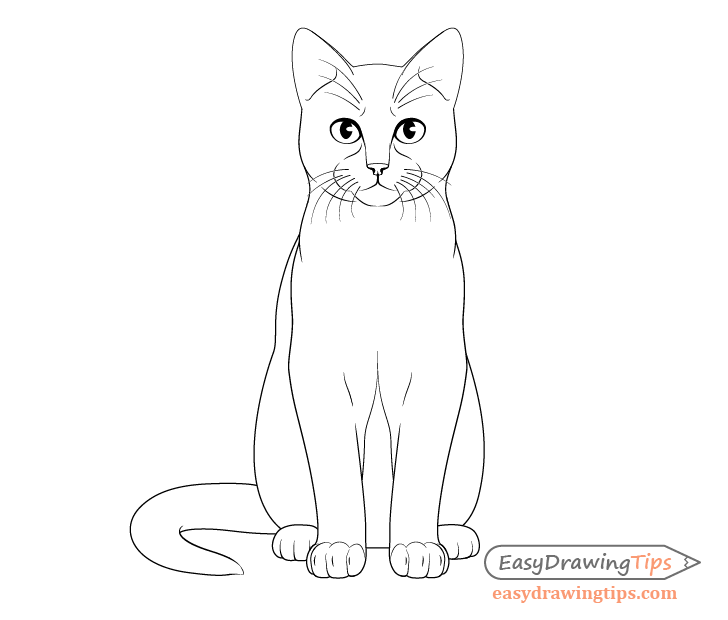
Step 5 – Outline Drawing
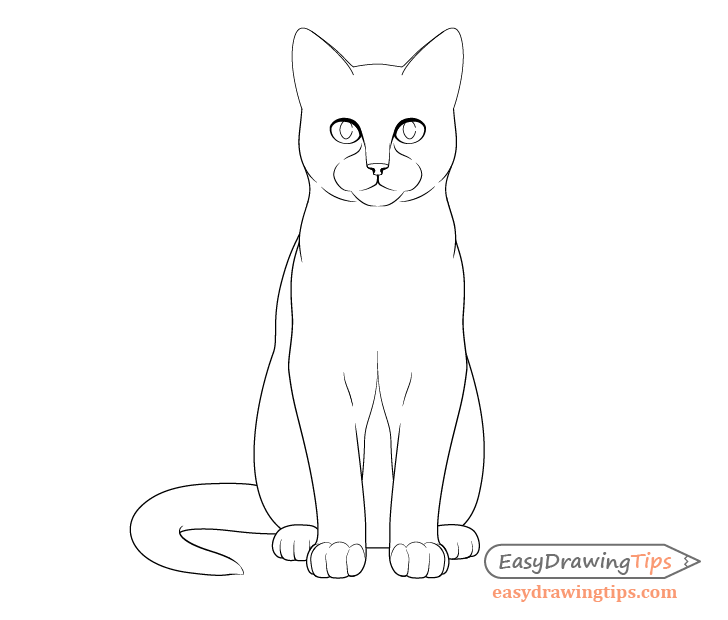
At this step remove all of the guidelines and go over your drawing with a more solid stroke. Don't make the stroke too dark yet if you are drawing with paper and pencil as you will want to erase it in some parts for the last step of the tutorial.
Step 6 – Minor Details
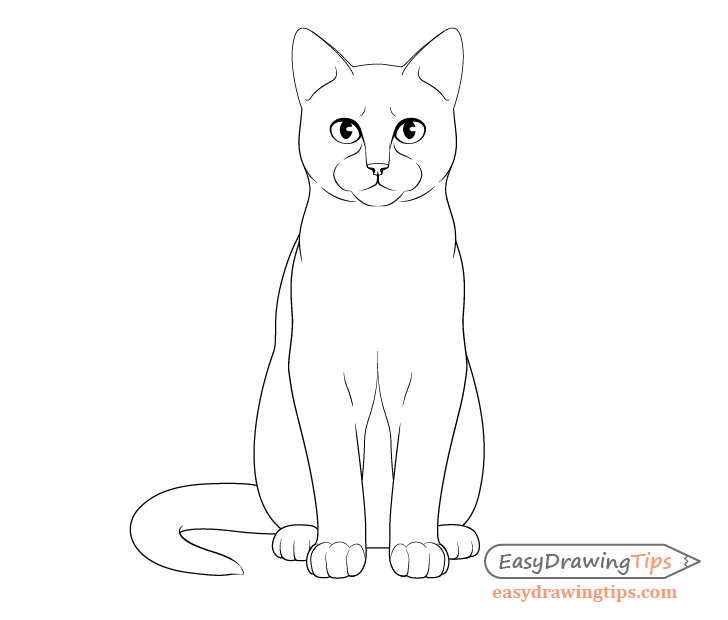
In this step you can fill in the eyes excluding the reflections. You can also add some details of the inner ear and forehead.
Step 7 – Whiskers & Claws
Draw the whiskers and the eyebrow hairs. Try and make these of slightly varying length and positioning to make them look more natural. Keep in mind that the overall shape of the whiskers still fans out fairly evenly.
You may also want to add some claws or claw areas in this case on the front paws. As cats have retractable claws you wont really see the claws themselves when their front paws are in a relaxed state.
Step 8 – Fur
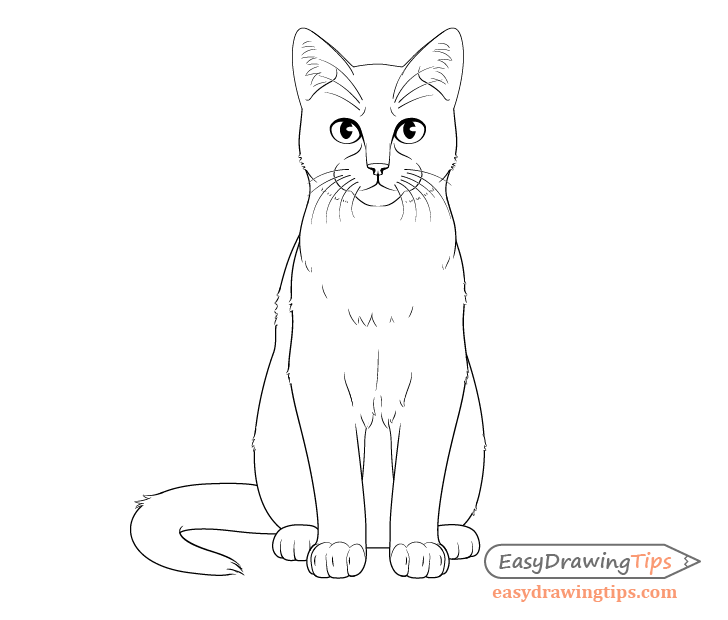
Finally you can add some small touches of fur. The fur will particularly tend to stick out where there are some curves on the body as well as the neck area where some cats have a mane. There will also be some fur inside the ears though not as solid as over the rest of the cats body.
Try and draw the fur clumps of different sizes and pointing in slightly different directions to make the fur look more natural.
Conclusion
Drawing a cat is fairly complicated especially if you are a beginner to drawing. If you need more help try studying photos of real cats in different positions to gain a better understanding of their anatomy.
For more similar tutorials see:
- How to Draw a Lynx Face & Head Step by Step
- How to Draw a Lion Full Body Step by Step
- How to Draw an Eagle Head Step by Step
Source: https://www.easydrawingtips.com/how-to-draw-a-sitting-cat-front-view-step-by-step/
0 Response to "How to Draw Eren Jaeger Easy Warrior Cat Sitting Base"
Postar um comentário